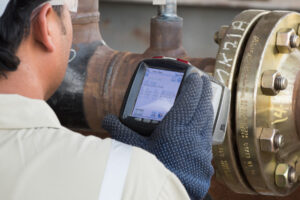
Positive Material Identification
(PMI) is the analysis of a metallic alloy to establish composition by reading the quantities by percentage of its constituent elements. Typical methods for PMI include X-ray fluorescence (XRF) and optical emission spectrometry (OES). X-ray fluorescence (XRF) is the emission of characteristic “secondary” (or fluorescent) X-rays from a material that has been excited by bombarding with high-energy X-rays or gamma rays. The energy is released in the form of a photon, the energy of which is equal to the energy difference of the two orbitals involved where the bombardment and release of atom to lower orbit. Thus, the material emits radiation, which has energy characteristic of the atoms present. The term fluorescence is applied to phenomena in which the absorption of radiation of a specific energy results in the re-emission of radiation of a different energy (generally lower).
Optical emission spectroscopy (AES) is a method of chemical analysis that uses the intensity of light emitted from a flame, plasma, arc, or spark at a particular wavelength to determine the quantity of an element in a sample. The wavelength of the atomic spectral line gives the identity of the element while the intensity of the emitted light is proportional to the number of atoms of the element. A sample of a material (analyte) is brought into the flame as either a gas, sprayed solution, or directly inserted into the flame by use of a small loop of wire, usually platinum. The heat from the flame evaporates the solvent and breaks chemical bonds to create free atoms. The thermal energy also excites the atoms into excited electronic states that subsequently emit light when they return to the ground electronic state. Each element emits light at a characteristic wavelength, which is dispersed by a grating or prism and detected in the spectrometer.

Hardness Testing
Hardness is the measure of how resistant solid matter is to various kinds of permanent shape change when a force is applied. Strong intermolecular bonds generally characterize macroscopic hardness, but the behavior of solid materials under force is complex; therefore there are different measurements of hardness: indentation hardness and rebound hardness. Hardness is dependent on ductility, elastic stiffness, plasticity, strain, strength, toughness, viscoelasticity, and viscosity.

Ferrite Testing
Ferrite testing measure welding, piping, austenitic and duplex stainless steel for ferrite content as in both Ferrite Number (FN) and % Ferrite (FN) .Ferrite content analysis is a non-destructive testing method which provides critical data for austenitic stainless steel and duplex materials. The delta ferrite percentage or number allows a technical assessment of material corrosion susceptibility, mechanical properties, service suitability, and service reliability. To perform properly ferrite testing, both a minimum material thickness and a minimum specimen size are required. Test results are interpreted in accordance with current specifications and/or customer requirements. Reports issued are accompanied when necessary by drawings to identify locations tested. Advantages of FT are Rapid and accurate analysis and highly portable digital technology.

